

Howdy, and welcome to Part Deux of our February Arts and Entertainment Challenge Tutorial. Today we are doing a Self Pawtrait at PicMonkey! If you missed Part One(How to use Pizap for your Self Pawtrait)
click HERE to transport over!

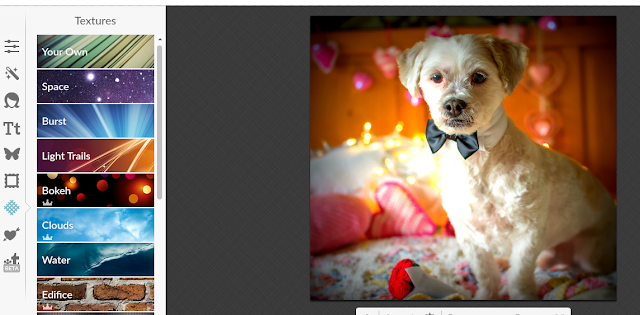
Today I, Jakey, will be the Supermodel!! This is the original picture I am using for my Self Pawtrait!

Let's head over to Picmonkey.com. Just a note, Picmonkey also has an application for Mama's iPhone (she hasn't checked her tablet yet). It doesn't have the textures that the computer version has..but it is still fun to watch Mama play with it!!
Now where was I...oh yeah:
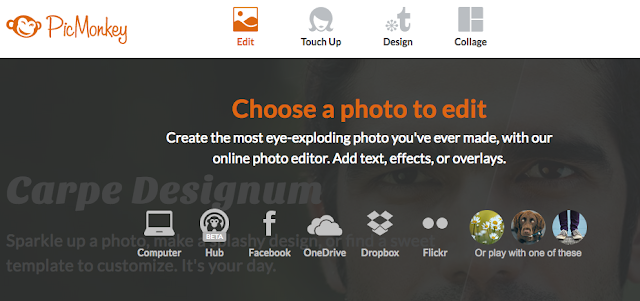
Click on Edit on the top left of the options. As usual, Mama keeps most of her pictures on the computer so we click computer to find my picture
(Daddy, on the other hand, keeps most of his pictures in Facebook).

Pick the picture you want for your self pawtrait and click Open!
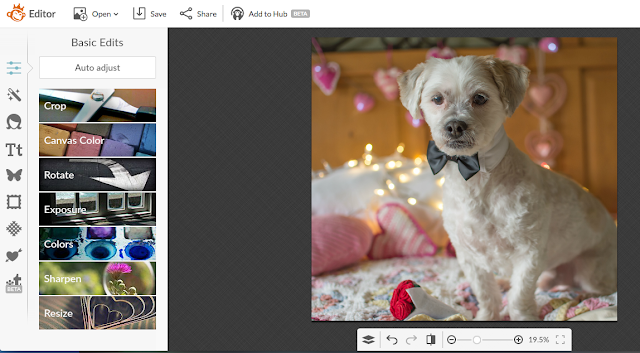
Pic Monkey can do millions of trillions of different things, but today we are going to look mostly at the Effects(Magic Wand, the second icon down on the left) and Textures (the cross hatch diamond 7 icons down on the left).

Here are just the Effect Groupings...there are so many wonderful effects to play with. Make sure to take your time and play with them!!
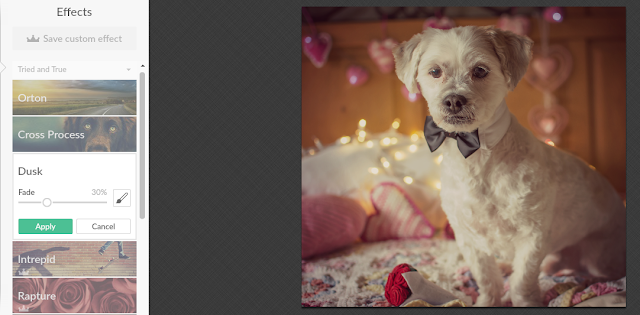
Here I am with a Dusk effect
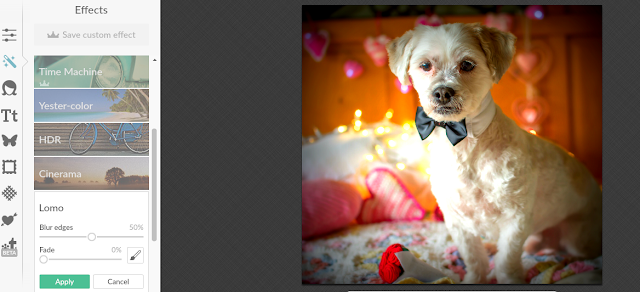
Here I am with the Lomo effect. I really liked this one so I hit apply to make sure I kept it when I went over to Textures!
PicMonkey also has tons of fun Textures!! Some of them are for Premium Members, but I just looked at the basic ones for now! Jus another warning, make sure your assistant does not start looking at these until AFTER your dinner has been served!
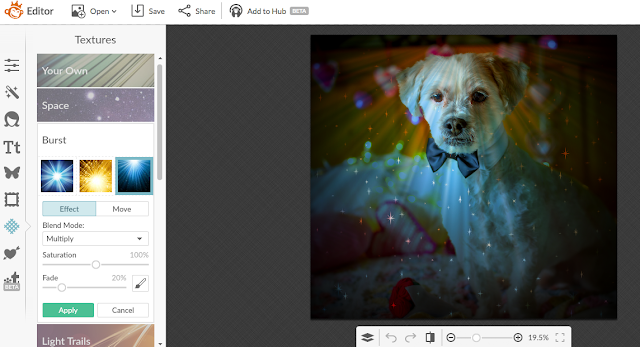
Check out this cool Burst effect!! It looks like it's raining stars!
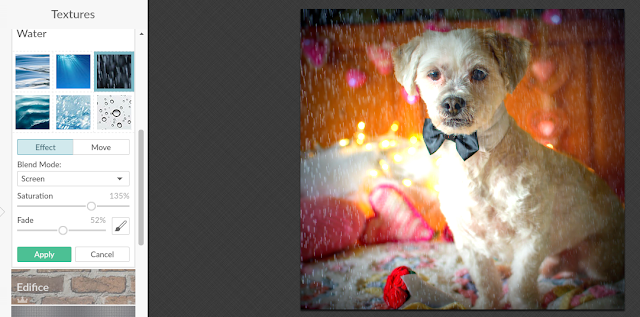
But the one I really liked was the water textures!! I chose this one that kind of looks like the rain that is falling outside...but I didn't even get WET!!!
Mama played with the slider thingies until we both liked the way it looked and the hit "Apply"!
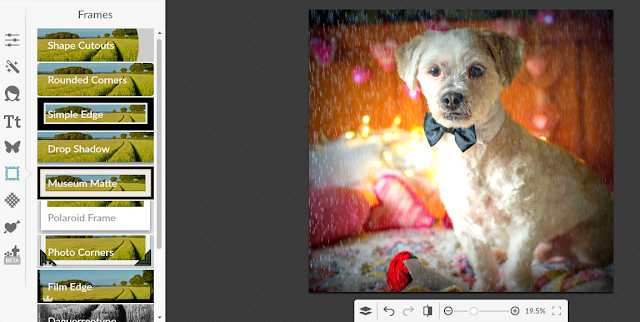
Because this effect and texture didn't have a frame, we decided to add one, lickedy split! We went to the frame icon and picked the Simple Edge frame.
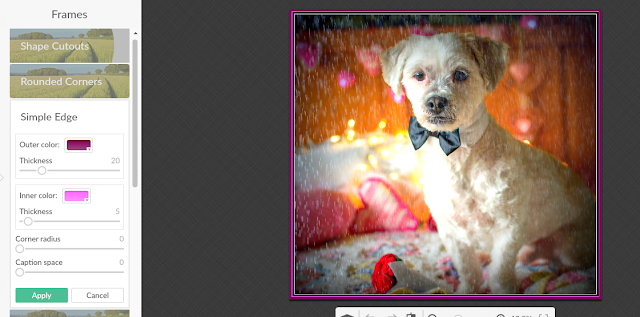
It gives you the option to change the inside and outside colors, so we made the frame a little more Valentine-y with some purple and pink!
Easy Peasy!!

Now, it's time to save our masterpiece!! So let's click on the Save icon at the top of the screen!
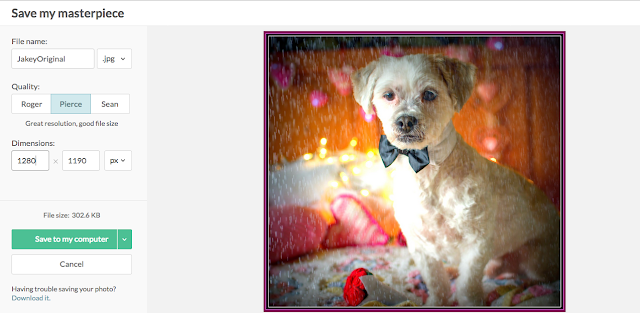
Mama's camera takes pictures in REALLY BIG dimensions, so she always resizes them a bit smaller. Make sure to leave us a comment or email us at bethblog(at)ebchristians(dot)com if you want more information on resizing. One trick, always resize smaller NOT bigger or you may end up looking a bit fluffier and fuzzier than usual! BOL!
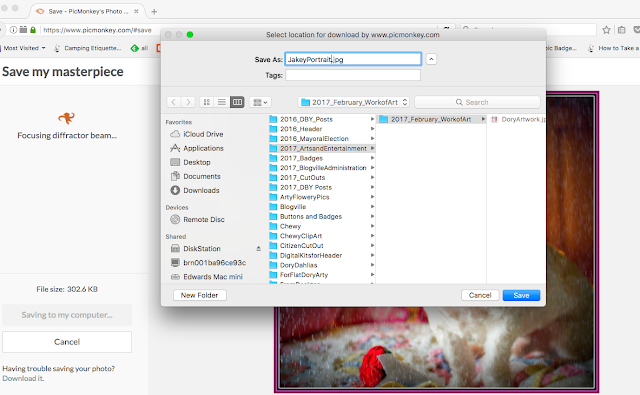
Most important of all, make sure your assistant saves it somewhere where they will remember!! TeeHeeHee!!
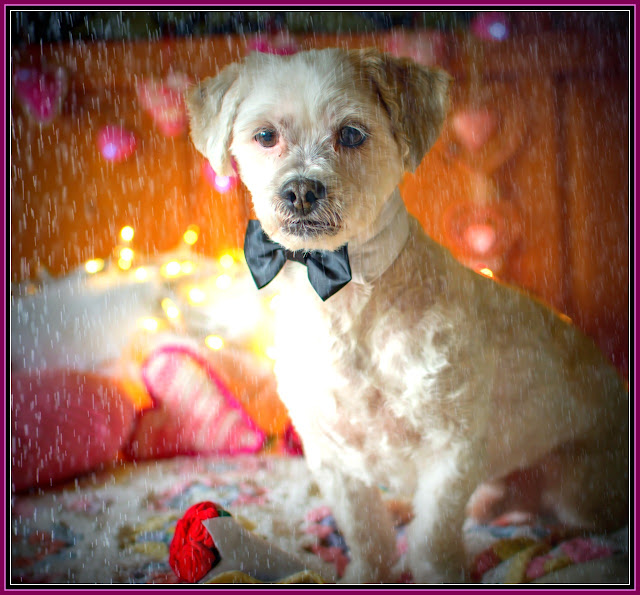
TADA!!!
Here is my Self Pawtrait for Louis's February Arts and Entertainment Challenge!! Make sure to read all about it
HERE and get your entries in before the February 15th Dead Lion!
thanks for sharing so much wonderful ideas including how we can create a real artpiece... I will look if I can create art too for that compawtition :o)
ReplyDeleteAll those effects are wonderful, you really get a lot with that app!
ReplyDeleteElliot and Cricket x
What cool effects!
ReplyDeleteGreat tutorial Prof Jakey....I will get Mum on the case this weekend, hopefully we can avoid the bubbles outta the nose effect!
ReplyDeleteLoves and licky kisses
Princess Leah xxx
What a great tutorial and a great picture.
ReplyDeleteAnother wonderful tutorial. Thank you for sharing.
ReplyDeleteMolly and my Mom @The Fast and The Furriest
http://thefastandthefurriestat.weebly.com/
Arty, it is great that you and your assistant do this public service for Blogville. Now, if I could just change my identity on your comments section from lexi to amy without it messing me up all over google, life would be perfect. I will have to go with the idea that you all know who is leaving the comment. :)
ReplyDeleteTaDa for sure and OH how mom loves PicMonkey. It is so easy to use and so versatile.
ReplyDeleteShe is learning more and more about Pizap too
Hugs madi your bfff
Well, that seems easy enough. Mom will have to see if she now can make it work. Thanks.
ReplyDeleteAroo to you,
Sully
Thanks for all the good tips
ReplyDeleteSnorts,
Lily & Edward
I'll have to check out the lomo effect, it looks pawsome!
ReplyDeleteArty, we think that is an EXCELLENT Picture of you. AND we like all your tips, too.
ReplyDeleteYou guys are SO good at this! Great tutorial -- and super pose, Jakey!
ReplyDeleteCammie!
We really like the rain effect! Mom was home today (she had a floating holiday to use or lose it before the big day) she worked on our portraits!
ReplyDeletehugs
Mr Bailey, Hazel & Mabel
Another great tutorial. So now we have a few different ways to go. We got Mom to pick out a couple of pics for each of us, now to get busy with PicMonkey:)
ReplyDeleteThanks.
Woos - Lightning and Misty
A most handsome self portrait of you, Jakey! We love PicMonkey!
ReplyDeleteOh! Wow! This is fabulishious! Yous looks totally marvelous darling! Will yous be pawticipating in Caturday Art with this? Mes thinks yous should.
ReplyDeleteKisses
Nellie
ReplyDeleteYou look extra wonderful Jakey! And that was very helpful for all the folks who aren't familiar with PicMonkey! :)
the critters in the cottage xo
I have never used PicMonkey but love the effects. Thanks for the information so I can learn to play with it.
ReplyDelete