
MAY 18, 2018
REFRESHER TUTORIAL for
BLOGVILLE DAY AT THE AMUSEMENT PARK


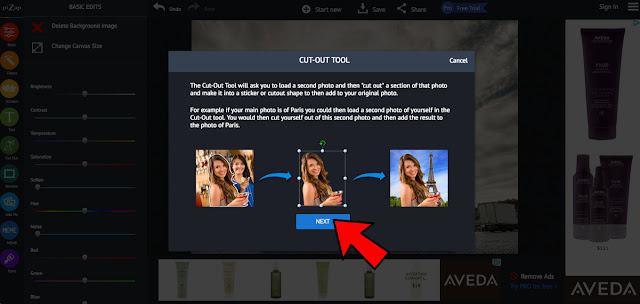
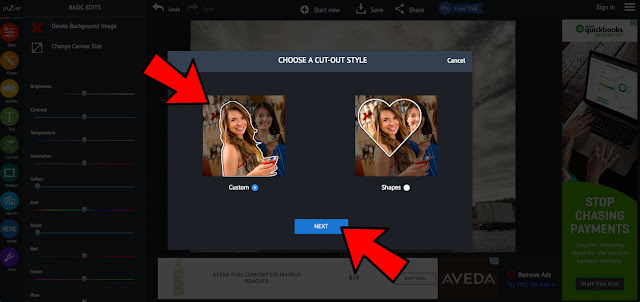
Hello students and welcome to this Pizap refresher for those who may need help getting on an amusement park ride for the upcoming Memorial Day Pawty! You'll see today I have done a couple of different things. First, I am posting this directly to the tutorials page, mostly this is because Mama might forget to move it here. But here is the main reason, I have referred to the previous lesson(Postcards from Paris) for two sections of the lesson since they are the same procedures(Using the Cutting Out Tool and Saving Your Masterpiece). Please raise your paw if you get confused(or have your assistant send me an email to the address on our sidebar) or if you have any questions!


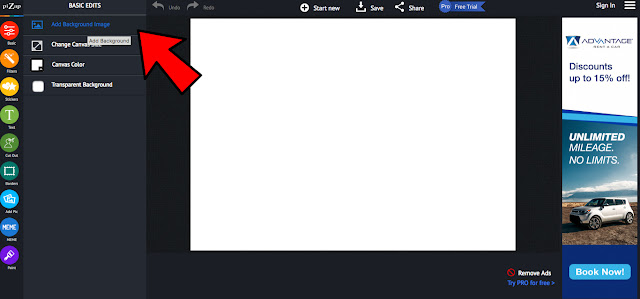
Click Add Background Image


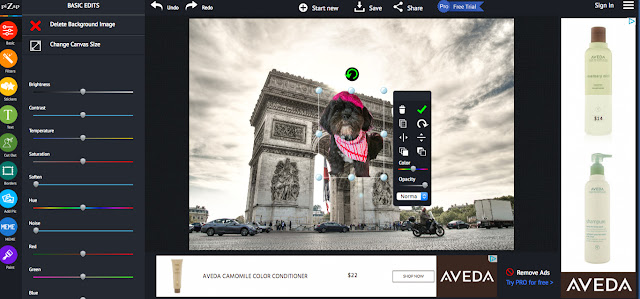
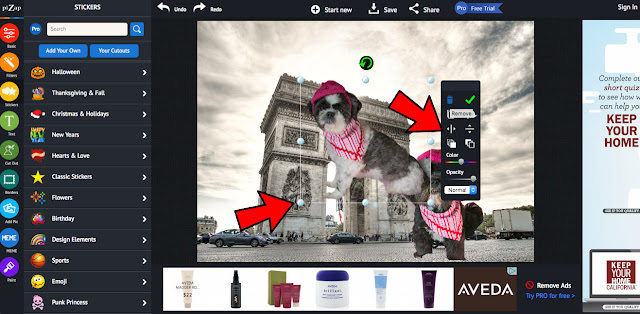
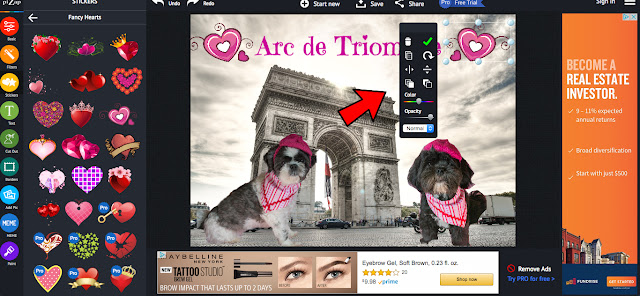
Being the rebel that I am, I decided I wanted to be going the other way. No problem, I just clicked on the Flip command!

(towards the middle of the Postcards from Paris lesson)
We'll wait :-)

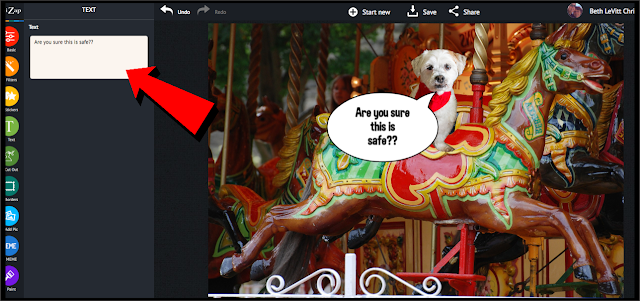
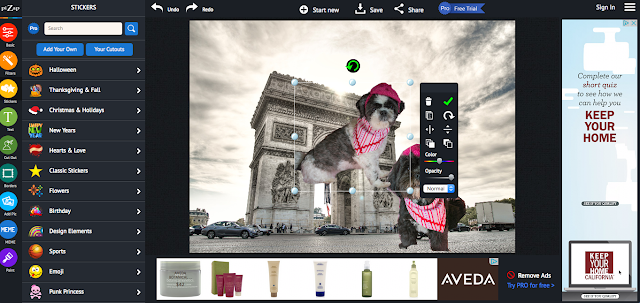
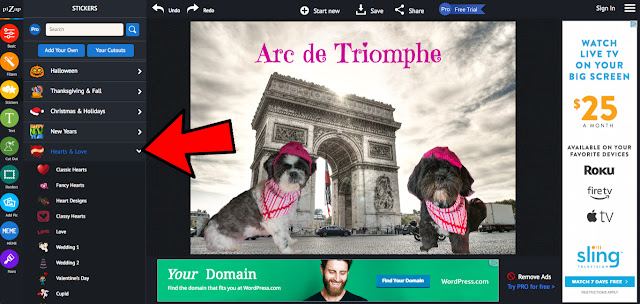
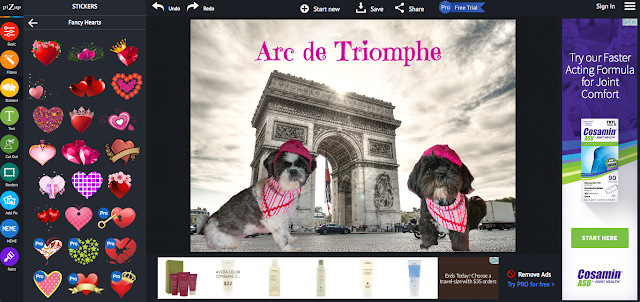
Now let's add a Word Bubble to let everyone know what I'm thinking. Click on the Text Icon on the left and then click on the text bubble you'd like.


Easy peasy, right??? Playing with Pizap can be as simple and easy as a few simple clickedy clicks or you can get as detailed as you want with frames and stickers! Since I am still helping Mama pack I am going to stop here and save my Masterpiece!
(towards the end of Postcards from Paris lesson)

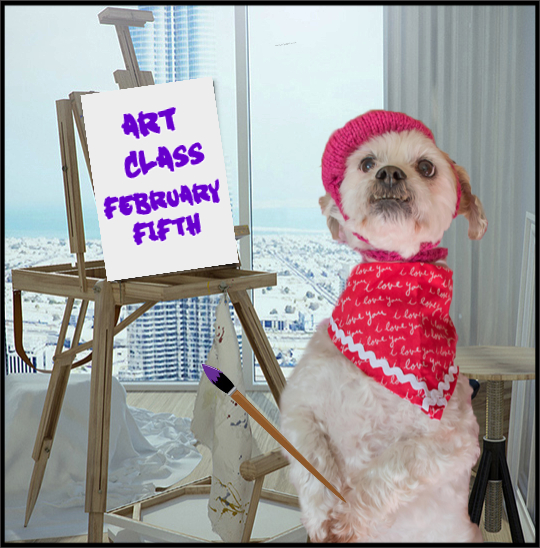
FEBRUARY 5, 2018
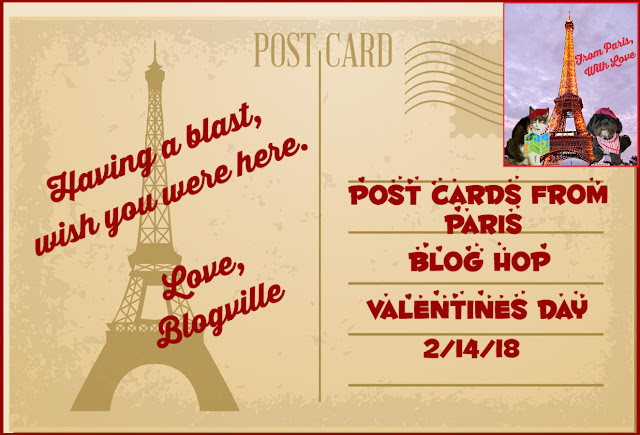
MAKING POSTCARD FOR POST CARDS FROM PARIS
BLOG HOP
Are you all ready to head to Paris for Valentine's Day??
Before
we get started with class today, we have had a couple of questions regarding exactly what
people should post for the Postcards from Paris Blog Hop.
First...you
can make a Post Card showing yourself enjoying the day alone, with a
furiend, or with your Valentine! Just post the picture and link on up to
the Blog Hop!
You
can also do a post showing how you are spending your time while in the City
of Love, and include your Post Card(or snap shot) at the beginning or
end of your post.
Just be creative, have fun with it and we can't wait to see what you come up with!
Now...on to our tutorial!
***Disclaimer from Pawfessor Jakey and Mama:
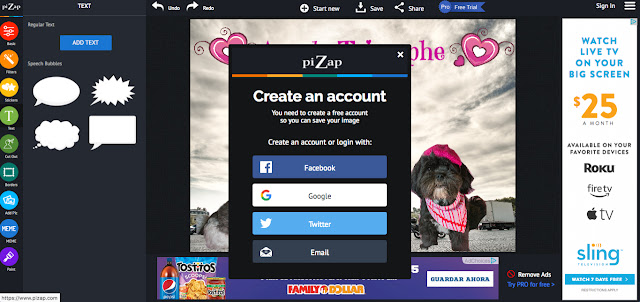
When we started this tutorial we didn't realize how much Basic Pizap had changed. It now requires an "Account" to save your pictures. We understand if this isn't something you want to do, but we wanted to let you know it is possible to delete the account after you have saved your picture. We(Jakey and Mama) haven't had any issues with Pizap spamming us, but we are Pro members. We did create a temporary account in order to do this tutorial and haven't had any issues either.***
When we started this tutorial we didn't realize how much Basic Pizap had changed. It now requires an "Account" to save your pictures. We understand if this isn't something you want to do, but we wanted to let you know it is possible to delete the account after you have saved your picture. We(Jakey and Mama) haven't had any issues with Pizap spamming us, but we are Pro members. We did create a temporary account in order to do this tutorial and haven't had any issues either.***
With that said, let's get started!
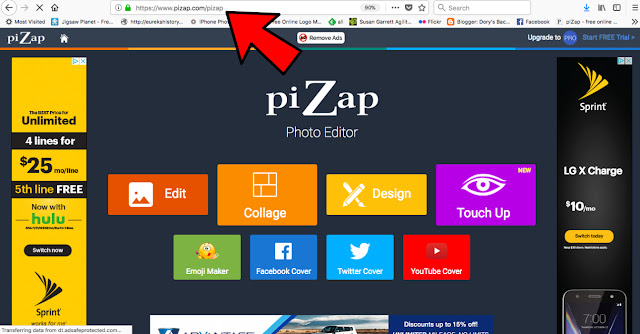
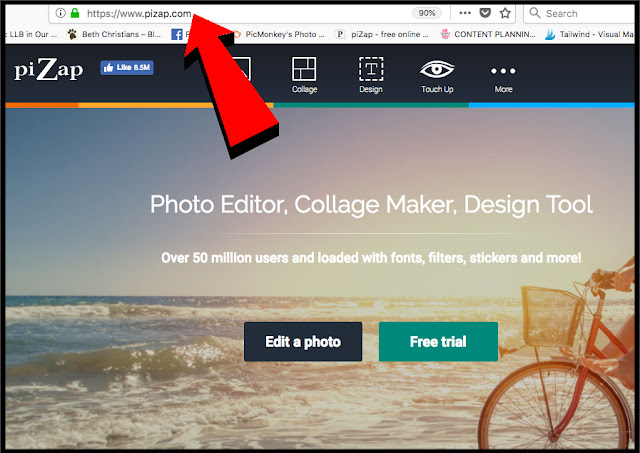
First, head over to Pizap.com
(but feel free to experiment with any template)

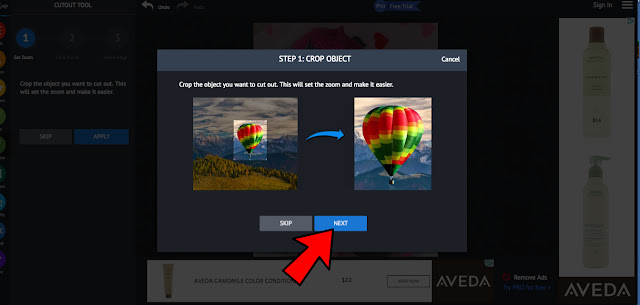
(you can also skip this if your photo is already a good size)
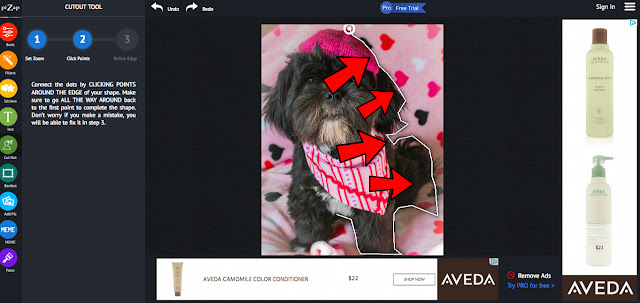

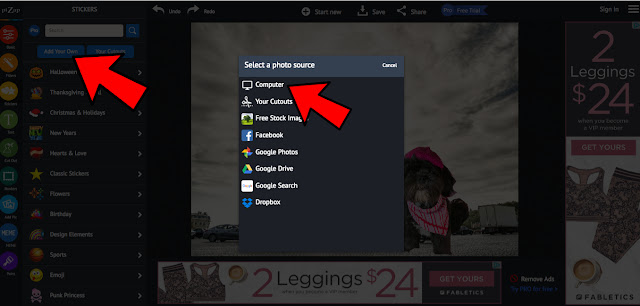
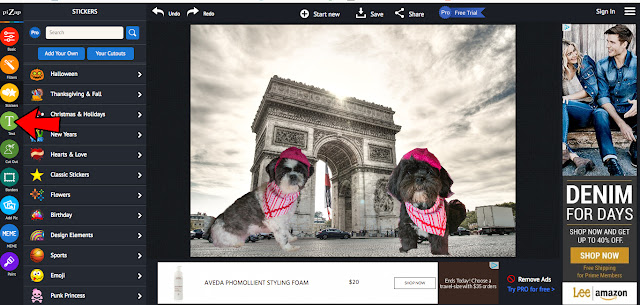
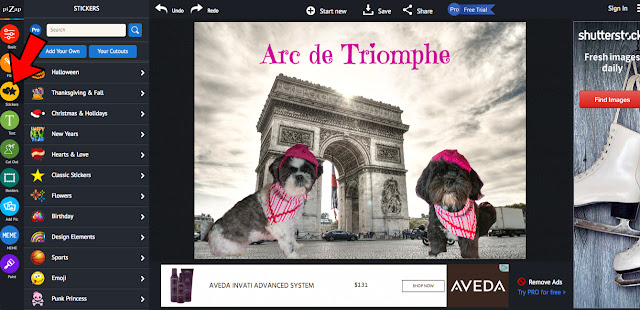
Now...We are going to use a slightly different way to add Arty! We keep cut outs of our pack to use in different Blogville events, this time we are going to add our own cut out.
*******************************************************
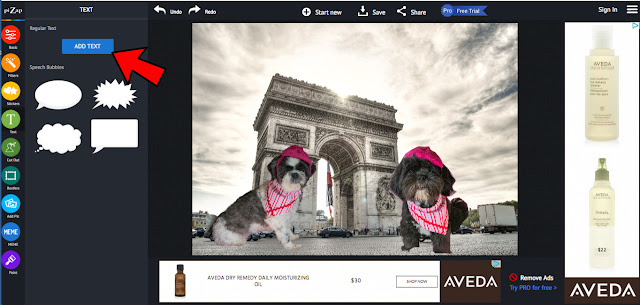
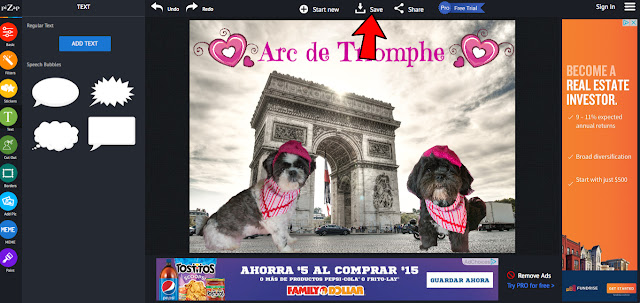
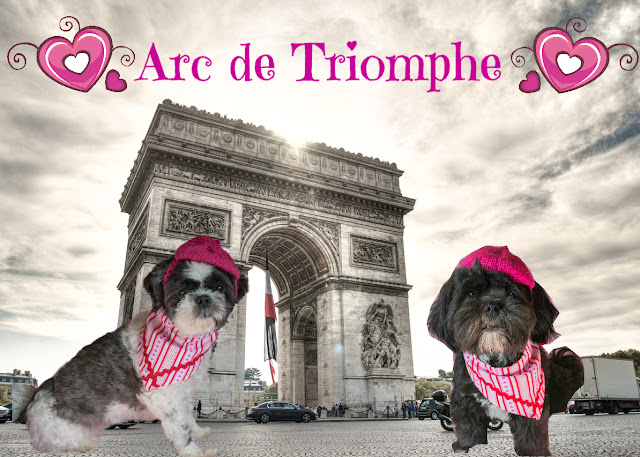
We also added text to let everyone know where we are!
We clicked the Text icon on the left side.

We used the Emily's Candy font, but if you click on the Font box, Pizap has bunches and bunches of fonts to choose from!

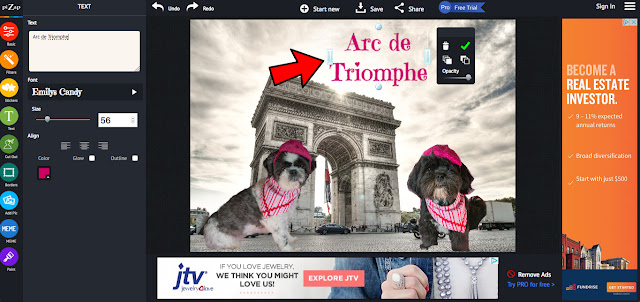
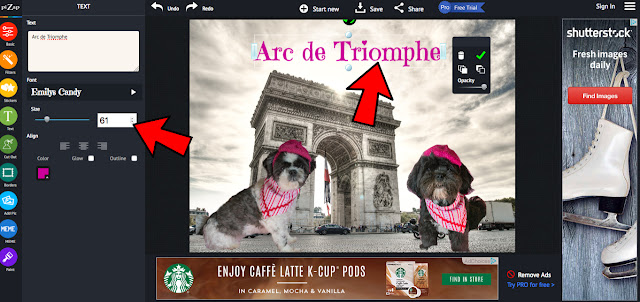
Then you can adjust the size of the font with the little toggle buttons next to the font size.

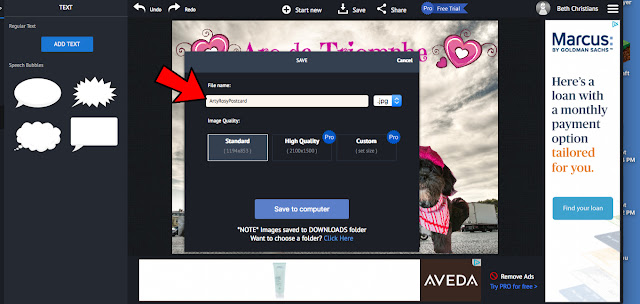
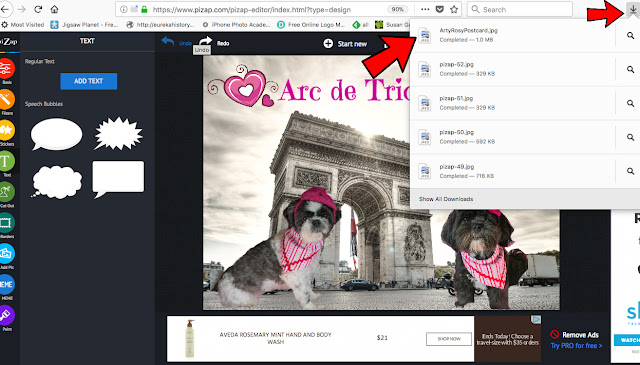
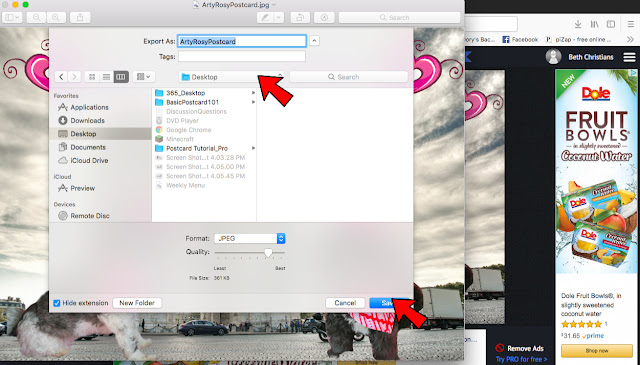
Now it's time to save our masterpiece!
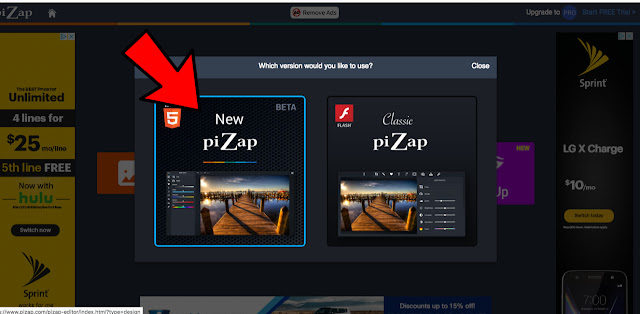
After you create an account it will bring you to this screen
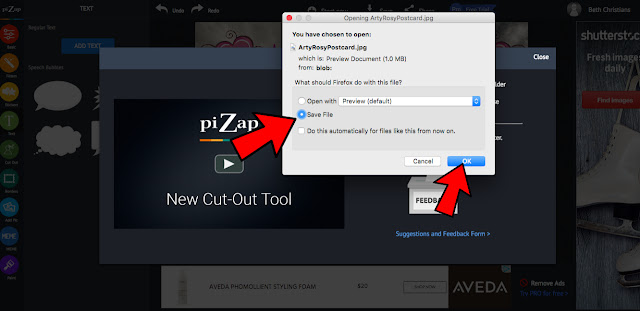

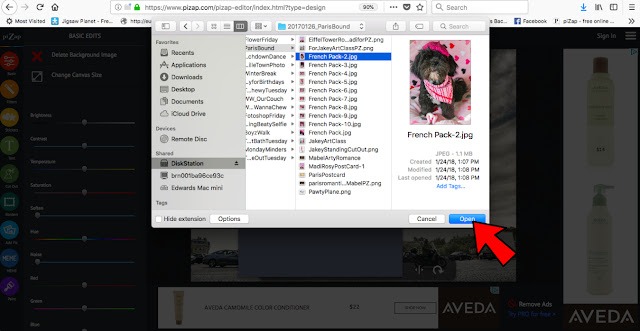
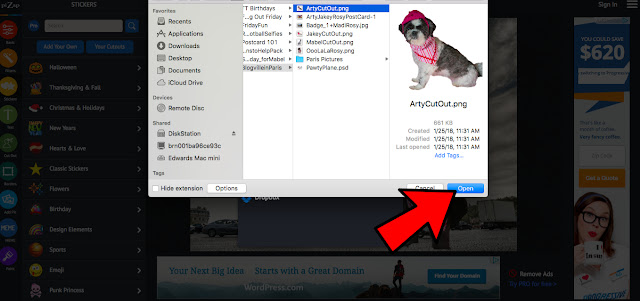
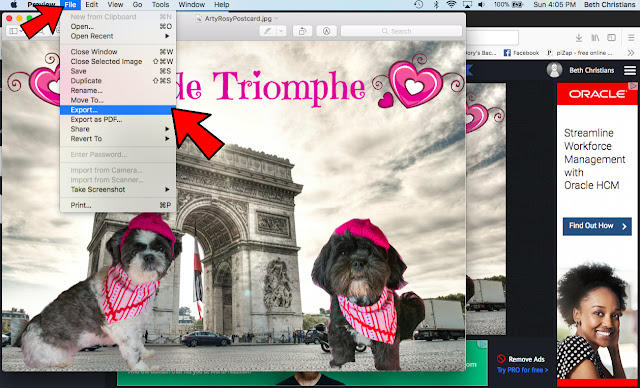
We have a MAC, so Mama opened the post card by double clicking the Arty Rosy Post Card file
**************************************
Still confused? Ask questions in the comments or email us and we will do our best to answer them! Mama and I(Jakey) would also be happy to make a post card for you and email it back to you in time for the blog hop!
For those who would like to schedule their Valentine Day post, we should have the Linkytool added to our Hoppity Page later this afternoon or tomorrow!
PIZAP REFRESHER
FEBRUARY 9, 2017
Today's tutorial will be how to do an artistic self pawrait on Pizap and tomorrow we will be doing an additional tutorial on how to turn your self pawtrait into art on PicMonkey!!
Let's get started!
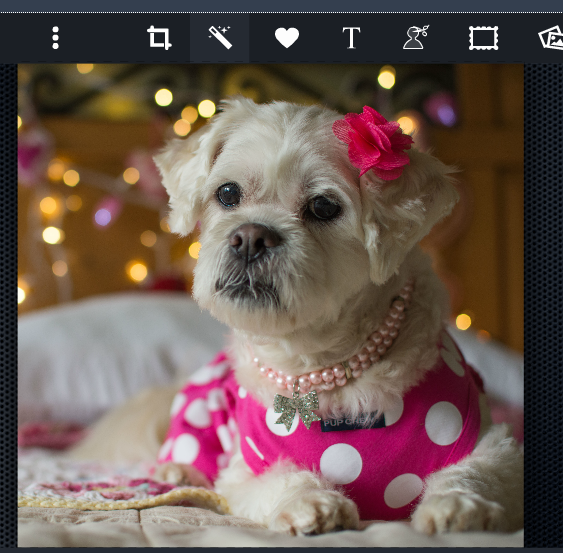
For
the Pizap Self Pawtrait, Dory has agreed to be my Super Model and the
picture above is the original picture we used! Before we get underway,
we want to tell you that the Pizap App is available for your phone,
tablet AND computer. This means your assistant can take your picture and
edit it, then send it all on any device you might have!
We
also want to let you know there are MANY different Applications
available to "Art-ify" your self portrait, just search for "Photo
Effects" on the device you are using....just be careful, we know our
assistant (aka Mama) loses track of time when she starts playing with
pictures and sometimes dinner ends up being LATE!!
Now, back to our tutorial!
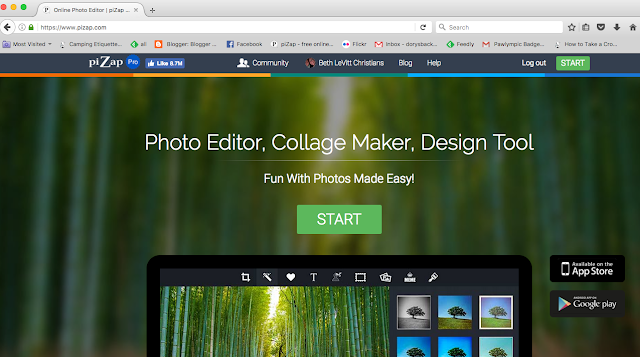
First, let's go to Pizap.com and hit the big green Start button!!
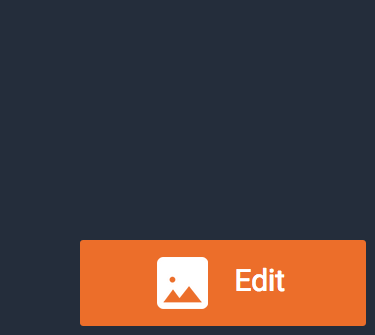
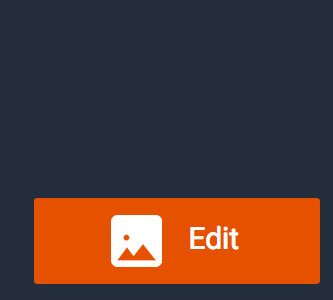
Next, click the edit button!
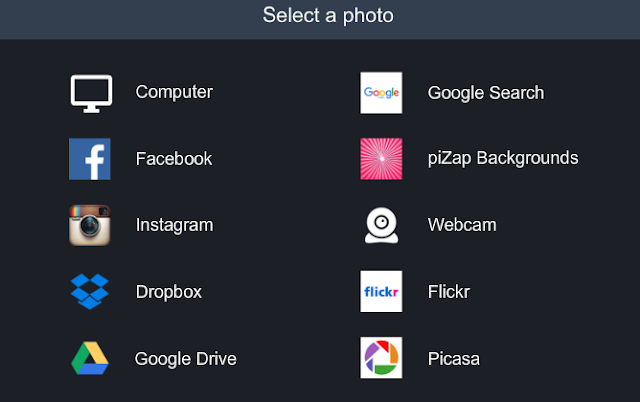
We keep all our photos on our computer, so we click the "Computer" icon here!
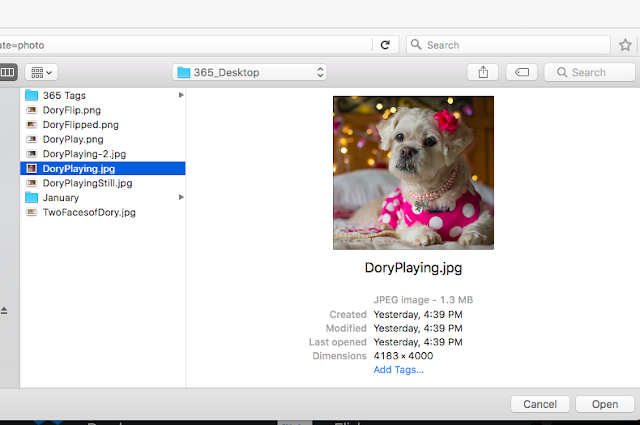
Choose the photo you want to use, and click Open
Click the magic wand at the top of the screen to bring up the Pizap effects!
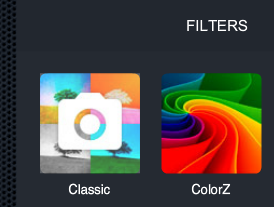
The two basic filters, or effects, are Classic and Colorz. If you have
Pizap Pro, you will have a few more options.
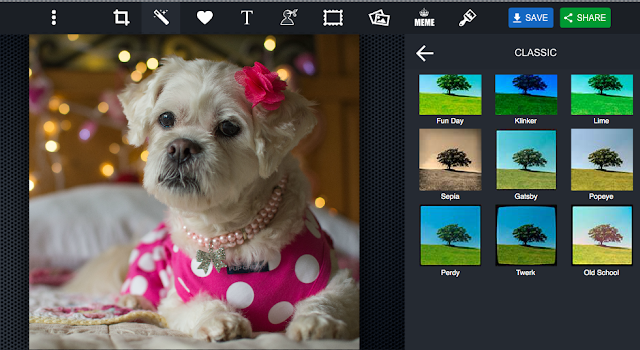
Now it is easy, peasy...Just click and see what filter you like best!!
Make sure to have fun trying each one out!
Here are only a few we tried:
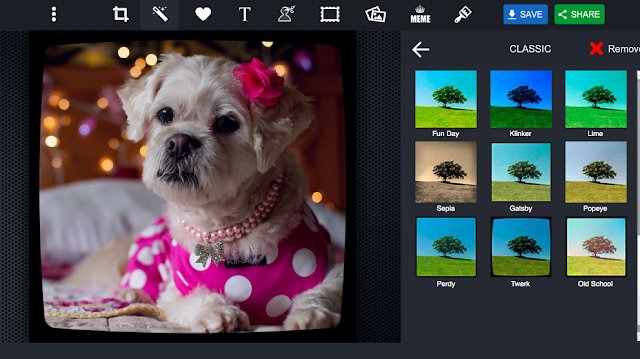
Here is Dory channeling her inner Madi with the "Twerk" Filter
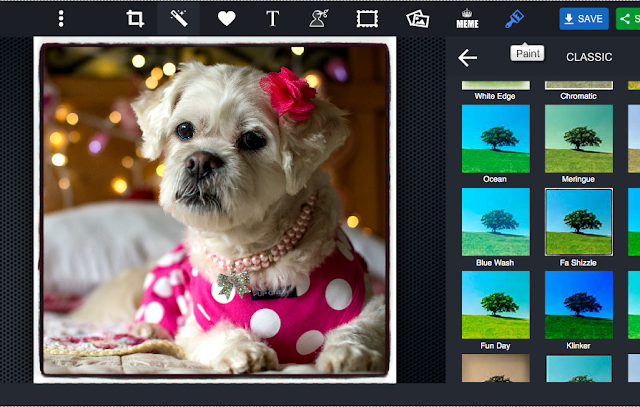
Here is Dory all FaShizzled!
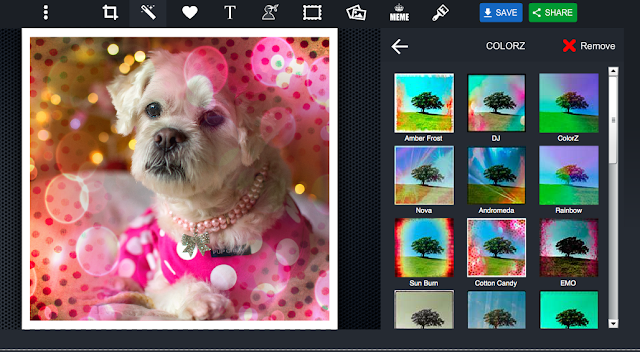
Here she is with the Colorz filter; Cotton Candy
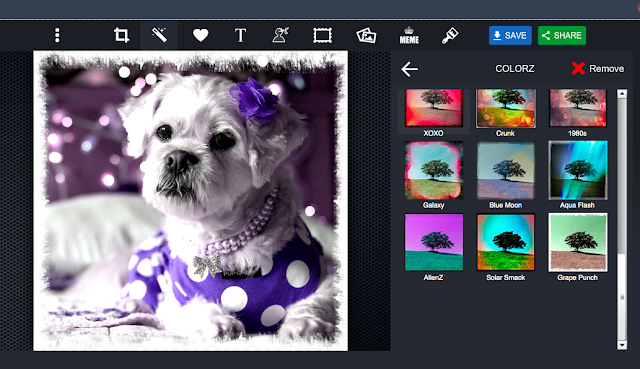
...and the Grape Pow Filter!!
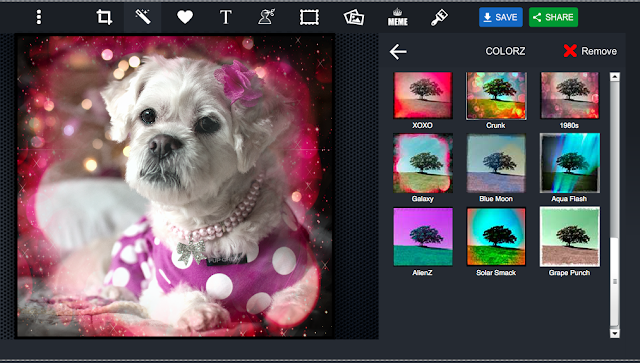
We
decided that, because Dory is a Star, we would go with the Galaxy
Filter! Notice that it already has a frame and everything!! So let's
save it by clicking the blue "Save" button at the top right of the screen!
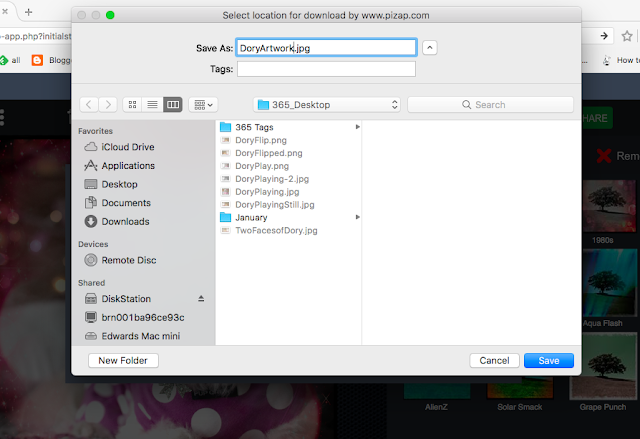
Now all that's left is making sure that you or your assistant
save the photo someplace they will remember!
save the photo someplace they will remember!

...an TADA!!! You have an Artistic Pawtrait that is out of this world (teeheehee)!!
PIZAP REFRESHER
JANUARY 9, 2017
Hi Everyone! Jakey here today with a tutorial refresher to help you create a picture for Louis 's Endangered Species Event!
If
you haven't read about this great event, hosted by Blogville's Director
of Arts and Entertainment, check out how you can be a part of it HERE!! Better hurry, the dead lion to get your pictures in is January 15th!
Now, let's get started!!

First up, pick your endangered species picture! We picked the Western Snowy Plover.
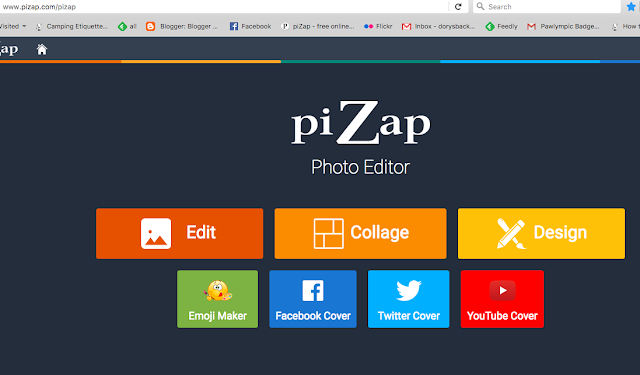
Next head over to Pizap.com!
Click on Edit
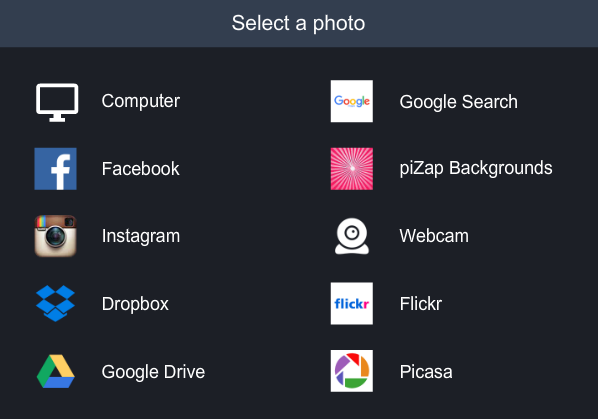 Click on the place where you stored your Endangered Species picture.
We always store our pictures on our computer, so we click here.
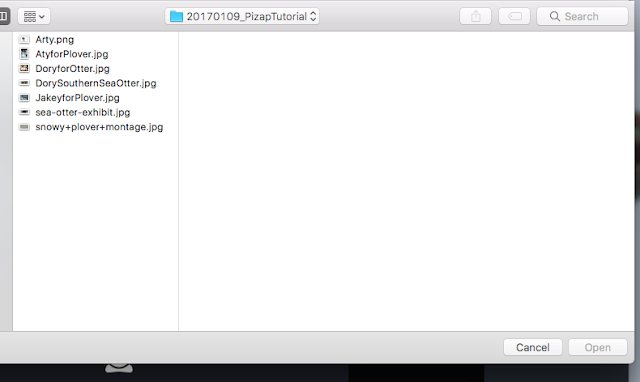
Pick your endangered species picture
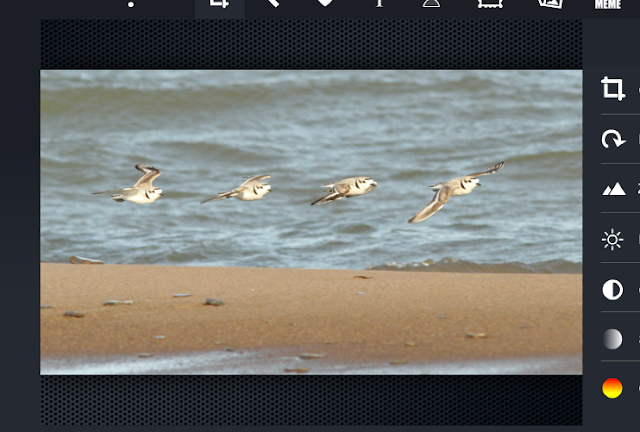
Here are our plovers!
Now, let's add Arty!

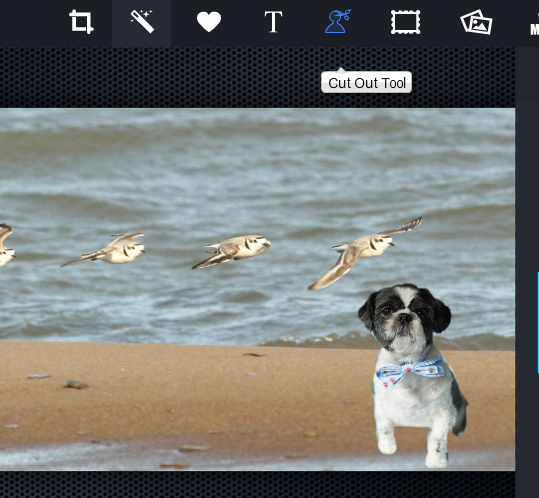
Click on the Cut Out Tool
Click the place your pictures are
All of Arty's pictures are on our computer
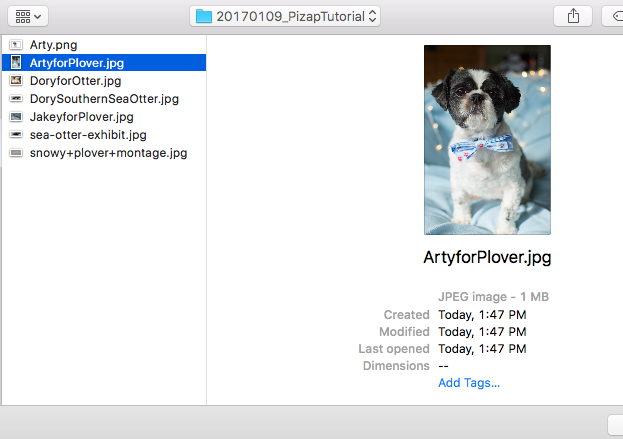
Here is Arty, let's select him.

Now let's color Arty all green!
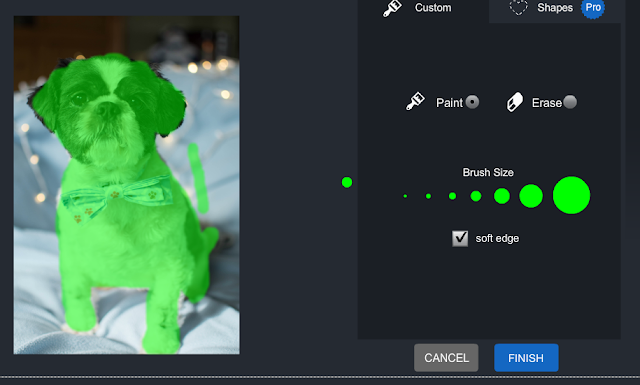
Oops, Mama made a mistake, but no problem!
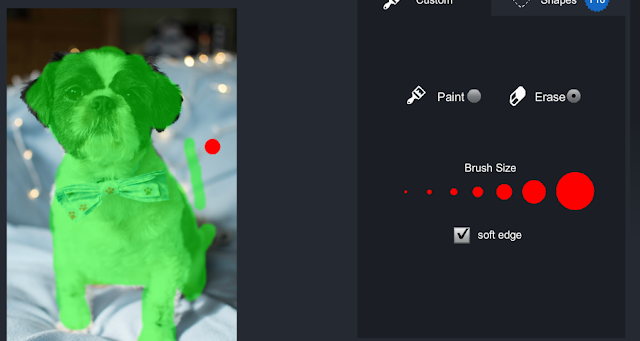
Just click the "Erase" button and erase any mistakes you make.
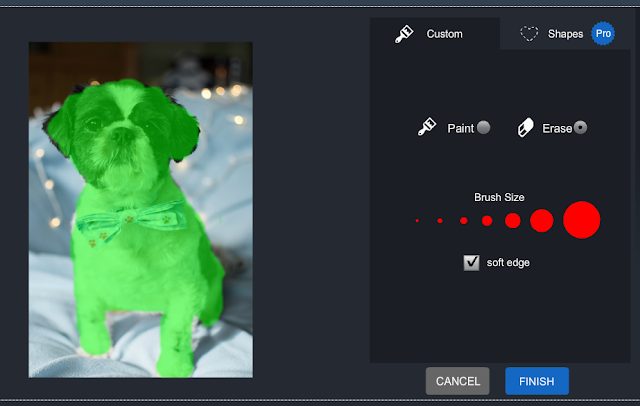
Once your have colored in the area you want to cut hit "Finish"
Oh no...It's Arty the Giant!! Let's shrink him a bit by dragging the corner of the cut out down a bit.
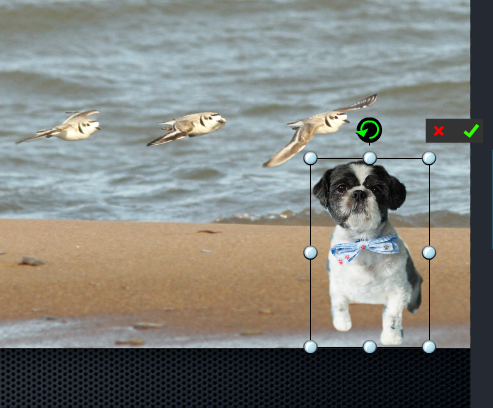
Whew, that's better!! When you have the size you want, click on the green check mark.
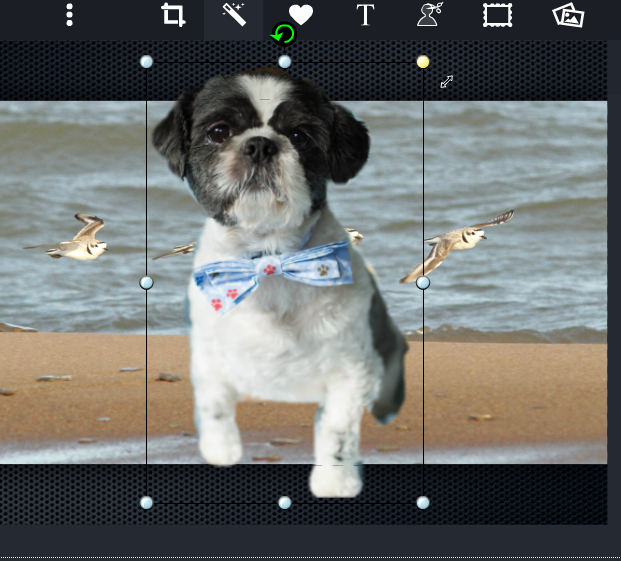
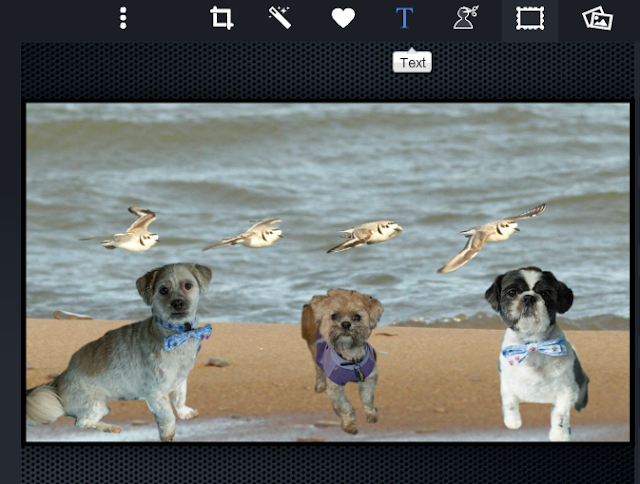
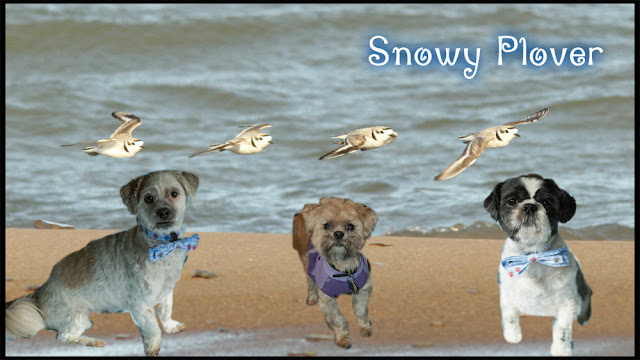
and TA-DA, there is Arty on his beach with the plovers!! Now Mama is going to add Bilbo and me to the picture by repeating the same steps used to add Arty

Here we all are!!
Now,
you can stop at this point, but we added a frame and some text to our
picture. To add a frame, click on the frame icon to the right of the
cut out icon.
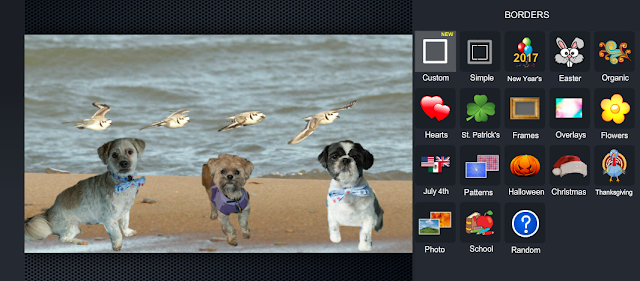
There are lots and lots of frames in Pizap! Take some time to look around! We went for a black frame from the "Simple" frame category.
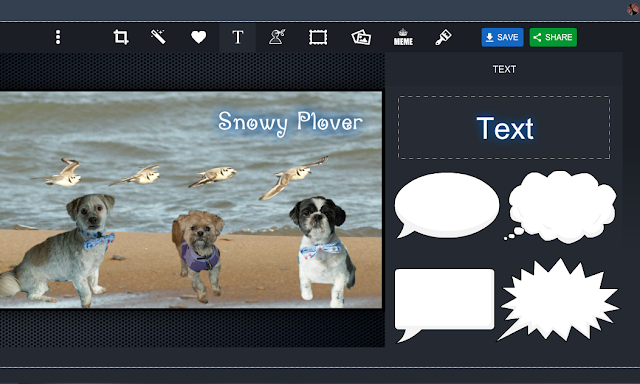
Next
we added some text so people would know right away what our endangered
species was. To add text click on the T to the left of the cut out tool.
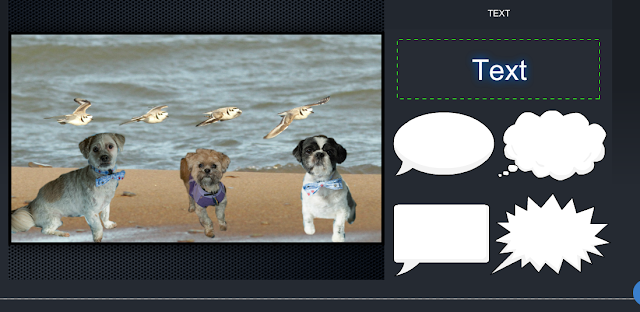
We are just going to add a line of text, so we clicked on the "Text" box at the top.
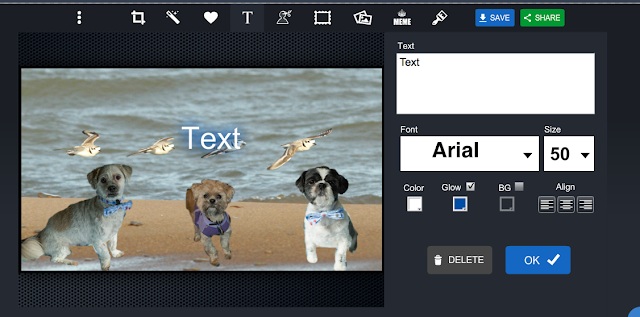
Then we typed our text in the white "Text Box".
We wrote in our endangered species, Snowy Plover.
We wrote in our endangered species, Snowy Plover.
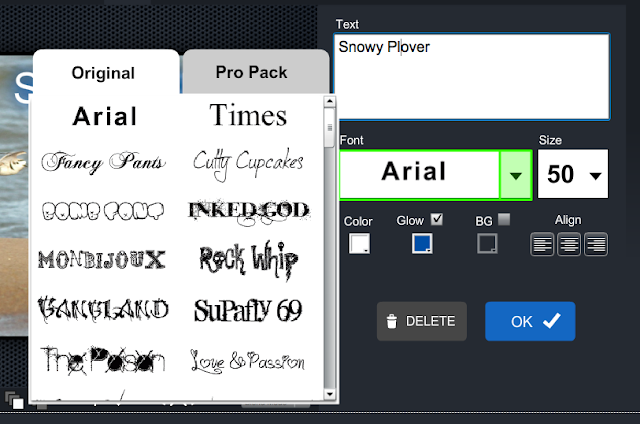
You can leave the font as it is, or you can pick a new font by clicking the arrow lit up in green above.
We decided to go with a birdy font and picked the Penguin font!
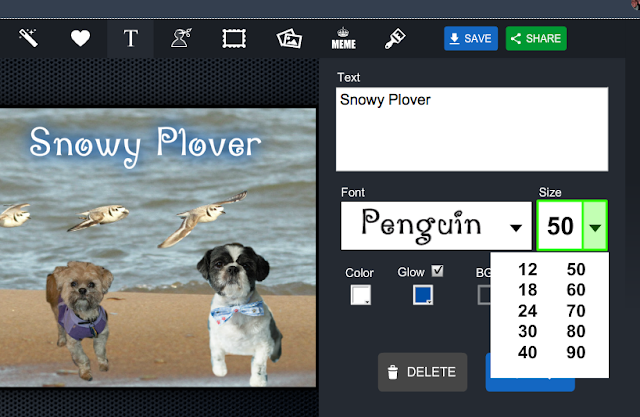
You
can also make your font bigger or smaller by adjusting the size! Just
click on the drop down arrow to the right of the current font size!
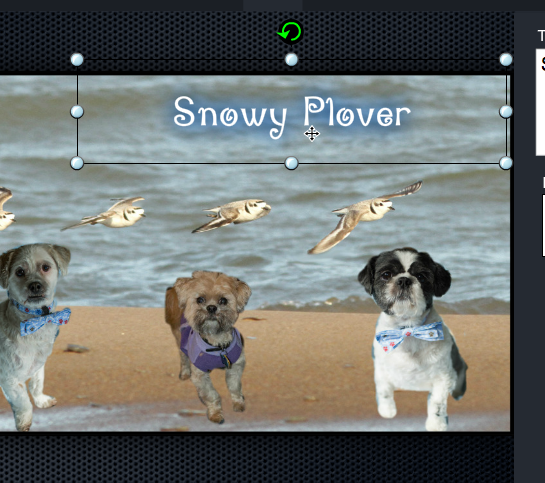
Move your font anywhere on your picture by clicking on the text box and dragging it around!
Now it's time to save your picture!
First click on the blue "Save" button in the upper right hand corner.
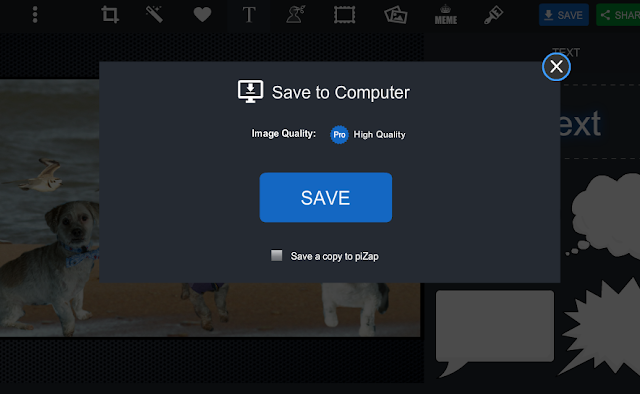
Then click the big blue "Save" button.
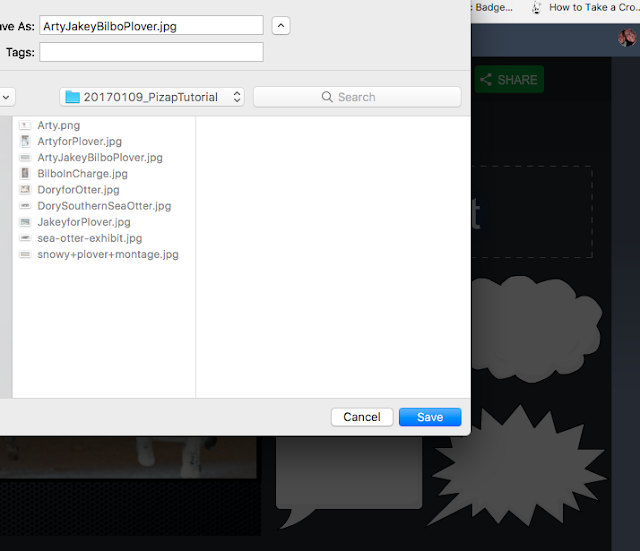
Finally,
if you let your assistant save it all by themselves, make certain they
write down where they saved it!! We now make our Mama either write it
down or save it to her desktop so she can easily find it after it is
saved!!
All of this only takes our assistant 15-20 minutes. The longest part is finding all the pictures she is going to use!
We hope this helped a little!
Please let us know if you have any questions or concerns either in the comments OR by emailing us at
bethblog (at) ebchristians (dot) com.
~~~~~~~~~~~~~~~~~~~~~~~~~~~~~`
AUGUST 12, 2015
PIZAP REVIEW

Good Morning Class!! Thanks for joining me for our
Pizap Review!! Today we are going to create an Arty Prince! Before we start class today, here are a couple of reminders!!
First, make sure you get your pictures to Oreo for the Demolition Derby! You can go HERE to read about the Derby and how to get your pictures in!!
Next, don't forget to get your King or Queen entries into us! You still have a couple of weeks, but you can follow this class today and get your picture to us while it is still fresh on your mind!! You can read more about the Derby Queen and King contest HERE!
Now...back to class!!

I
know this is mostly a refresher course for bunches of you, but we are
going to do all the "Dressing up" in Pizap this time. This is not only
easy, but also a pretty quick way to dress up a picture!!
Make sure you have 2 initial pictures before you begin.
1. A picture of yourself
2. A picture of a car
(if you want one that is, you do not HAVE to have a car to enter!!)
Once you have your picture(s), head over to www.pizap.com and get started!!

Get started by clicking on Edit!

For Arty's Prince picture we chose one of Pizap's many backgrouds!

In our case, Arty wanted to be a city guy, so we found him a skyline background!

Now, let's add Arty's car by clicking the Cut Out tool!

We store our pictures in our special DBY computer banks, so we click computer!

We find the picture of Arty's car and click open!

Then
we (A) color in Arty's car! Now don't forget, if you color outside the
lines, you can click the (B)Erase button and erase your mistake!

Now, let's add Arty! We clicked on the Cut Out tool again and opened Arty's picture,
(we went to the same place as our car, so you can repeat those steps)

Then colored in Arty and click finish!

Now let's dress Arty up!!!
First click on the "Heart" and you will see all the cool stuff in the Pizap closet, we started with the "Hats" and picked out a princely crown for Arty's head !

We adjusted the crown on Arty's head and gave it a bit of a tilt!

Now for the sunglasses we went to the Glasses stickers and picked some cool, city shades and adjusted them to Arty's face!

We then headed over to the Bling stickers to make Arty shine! We picked out a diamond collar for him and adjusted it to fit!!
Then
we wrote Arty Prince with Pizap's Text tool and hit save....saved it to
our computer where we would make sure she would remember and
TADA!!!

Prince Arty, ready for anything!!

AUGUST 6, 2015
USING PIZAP AND PICMONKEY TOGETHER

Hi
everybody, Jakey here with the first of a two part series to help
everyone get ready to compete in King and Queen of the Derby!!! You can
click HERE to read all about the contest!!
Now, step into my classroom and let's get started!
Today I am going to show you how I used Pizap and then PicMonkey to create my entry for Derby King!!!

We'll start by picking a background. Go to Pizap
and get started by clicking the Start button.

Click on the Edit button

Then click on the Backgrounds button and....

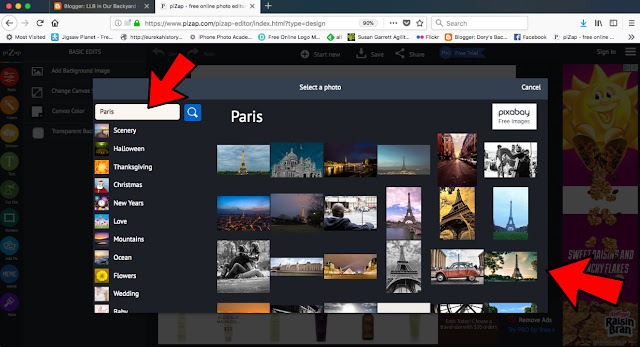
Peruse
the backgrounds for one that you like! They have so many to choose from
that sometimes Mama spends lots of time here just looking at all of
them!! I picked the sunrise type one and clicked on it!

This
is what the screen should look like after you select your background.
Now let's select the "Cutout" button and add my Derby Car.

We found a picture on the interwebs (***) before we started on our project and saved it to our computer before starting on our project.

Now color in the car and hit finish!

You can move the car around anywhere you want on the background I decided to put the wheels on the purple hill!

Now let's add a ME! Click on the cutout button and select the subject (in this case, ME) you want in front of the car!
 Next color the subject and click finish!!
 Here I am in front of my Derby car with the sun rising behind me!!!!
Let's go ahead and save this to we can open it in PicMonkey!!
First select the "Save" button in the upper right hand corner....

We just want to save it to our computer so I made sure all the siders were off with the exception of the one marked Computer.

I am saving it to my Desktop so I can find it easily.
Now let's open it up in PicMonkey and decorate it there!!

First, click on Edit
Next, open up your Pizap picture

Here I am ready to find something to wear in the PicMonkey closet!

Here is a close up of just some of the PicMonkey closet.
Now, time to get dressed!

First,
(1.)I selected some sunglasses, (2.)I positioned them over my eyes and
made them a bit smaller and then (3.) I changed the color to match the
sunrise!!

I found a cool Derby crown in the "Celebrate" section of the PicMonkey closet

I left it the same color (but you can change it if you would like) and positioned it on my head.

Now
the tie!(1.) I also found it under "Bows" in the Celebrate section. (2.)
I positioned it on my neck and (3.) changed the color to black!

Then I clicked the "Eraser" tab of the Overlay section and erased the tails to make it a tie instead of a bow!

Now give a once over to make sure you are happy with the results....
I think it looks pretty good, what do you think?
Let's go ahead and save it to use in the contest!
First, click on the Save button

Next, give it with a name and in a place you or your Peep will remember and then...

You have your picture!!!
Easy Peasy, right???
PIZAP - PART THREE
MARCH 12, 2015

Professor Jacob here, today we are concluding our three part
PiZap tutorial with a quick and easy St. Patrick's Day collage!
Ready?? Let's get started!!

We start at the beginning! Go to PiZap.com and click the big green
"Start" button

Now...click on the "Collage" button

There
are literally hundreds of collage formats to choose from!! Since St.
Patty's Day is coming up real quick, we chose the "St. Patrick's Day"
themed collages (on the lower left hand side).

Choose a template based on how many pictures you want to use.

We chose a template with room for four pictures, one for each of our pack! Now it's time to choose your pictures, let's click on on of the "Add Photo +"

Again, our Mama keeps our photos on our computer so we click "Computer".

Click on the photo that you want to use and then click "open"

Look, there's Dory!! Let's click the "Edit" box in the upper left hand corner.
 Uh Oh, we need to get Dory all the way in the frame!
We can do this by clicking and dragging the gray dots to resize the picture!

TaDa!!! Now Dory is all the way in the frame!

Now, just repeat the process with any other frame you are filling!

Here is our collage with the whole pack!
LEt's use text to wish effuryone a Happy St. Patrick's Day.

We can do this by First, clicking the "T"ext button at the top of the screen and then clicking the "Text Box" on the right hand side.

Then type in the text!

After you type in the text, you have tons of fonts to choose from!!

We chose the whimsical "Amadeus" font! We then clicked the "OK" button on the lower right side....and then the "Save" button on the upper right of the screen. Remember, make sure your staff saves it in a place she/he will remember!

and there you have it, an easy peasy St. Patrick's Day Collage!!
Thanks
again for all the compliments on our classes, we just love seeing all
the Blogville residents exploring the artistic sides!!
We will be saving all our photo classes to our "Artistic Tutorials" page for easy reference
Please
note that we are not advertising, and are in no way affiliated with
PiZap. It is a photo editing site that we enjoy using only. All our
opinions and directions are our own.
PIZAP - PART TWO
MARCH 5, 2015
Jakey, Director of Blogville's Department of Artistic Services here, with the next installment of our PiZap tutorial!
Today we are going to work on editing!!

When
we last left Bilbo, he was standing next to the ducks in the mud! If
you missed our tutorial on how to cut Bilbo out of the living room and put him in the mud you can click HERE to go to last week's tutorial :-).
This week we are going to splash Bilbo with some mud, put some (much needed) glasses on him and give him some words!

Let's get started by going back to PiZap.com and press that big green "START" button.

This time, we are going to click "Edit"
(since we are "editing" the picture of Bilbo)

Our pictures are on our computer, so we clicked
computer.

We opened the picture of Bilbo in the mud that we saved last week.

In order to get him a bit "muddy" we are going to splash him with a bit of red paint.
We picked the "paint" button.

Then we made sure the paintbrush button was chosen and changed the color by clicking the square by the brown arrow.

Once we found the right color, we "painted" Bilbo with
"mud" (and boy was that fun!!)!

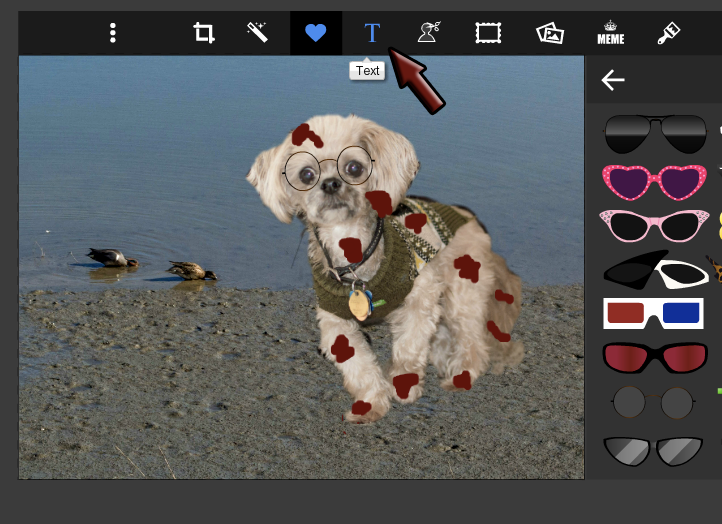
Now, since Bilbo has been complaining about not being able to see well lately, we fitted him with some glasses! We clicked on the "Stickers" icon (it's the one that looks like a heart).
We found the "glasses" category on the right, about halfway down.

Since Bilbo likes "Professor" type accessories, we chose some wire rimmed glasses. We clicked on them, moved the over Bilbo's eyes and sized them to his face by clicking and dragging the gray dots.
He kinda looks like Harry Potter, doesn't he??
BOL!
Now let's give Bilbo some words!!
We do this by clicking the Text button (the letter T at the top)

Next, we clicked a text bubble on the side. We chose a "thought bubble".
After that, we clicked in the middle of the text bubble to type the text, easy peasy!

Finally we changed the size of the bubble and moved it out of Bilbo's face.
We clicked outside the actual text box. See the dots all around the text bubble? We clicked and dragged these dots to make our bubble just a bit bigger.
We
clicked outside the actual text bubble (when the dots are showing) and
dragged the bubble out of Bilbo's face and to the side.
Once we got the text box where we wanted it and the size we wanted we clicked on the check.

Now all that is left is to make sure it is saved where Mama can remember it and.....

Tada!!! Bilbo has mud on him.... and he won't even have to take a bath to get clean!!
Stay tuned next week when we play with the collage part of PiZap!!
PIZAP - PART ONE
FEBRUARY 25, 2015

Jakey, Director of Blogville's Department of Artistic Services here.
We are combining February and March's Artistic lessons by doing a 3 week series of tutorials on different aspects of Pizap!
What is Pizap, you ask?? Why Pizap is a free photo editing and design program found right here on the interwebs!! You can get to it by clicking HERE, or just go to www.pizap.com! There is no fee to use Pizap, and you do not even have to "sign up" for them. Pizap is easy to use, pretty user friendly and can help you do LOTS of things!!
In today's
tutorial, we are going to learn how Bilbo can play in the mud WITHOUT
having to actually get dirty!! I know...it might not seem like much fun
to you....but Bilbo says he has a "reputation" to uphold...plus, he has
this thing about keeping clean all the time since he landed the most
beautiful gal in Blogville, Sasha!
OK....so let's get started! Here is what we are going to need.....
a picture of Bilbo to cut out and put in the mud......

Check!
...and a picture of a muddy area!

Check!

First...head over to Pizap and click that big green START button on the right!
(If you would like to join their community and save files to Pizap, you can sign up for a free account in the upper right hand corner)

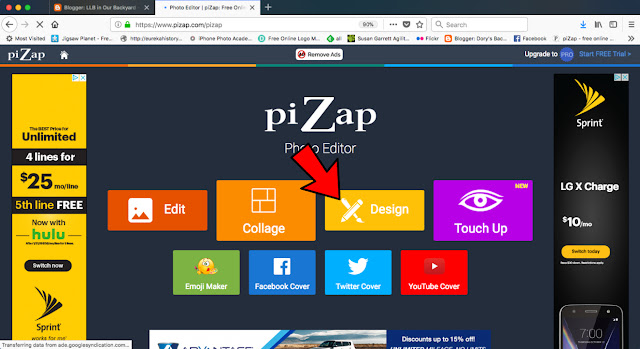
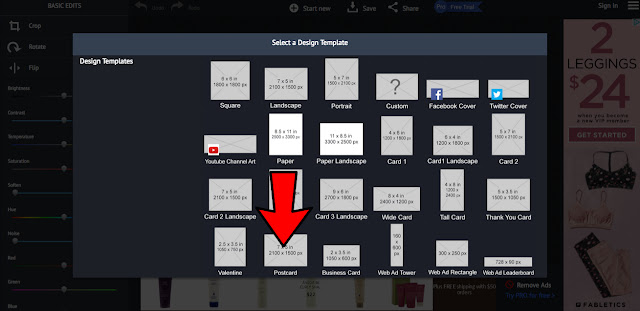
This is the screen you should see after clicking the START button. Click design for the picture we are going to make today.

Then it will ask you to choose a canvas shape. We are going to choose landscape because that is the shape of our picture.

Then click "Add Background Image" to add the image you want your subject. In our case it is the muddy picture where we want to Bilbo!

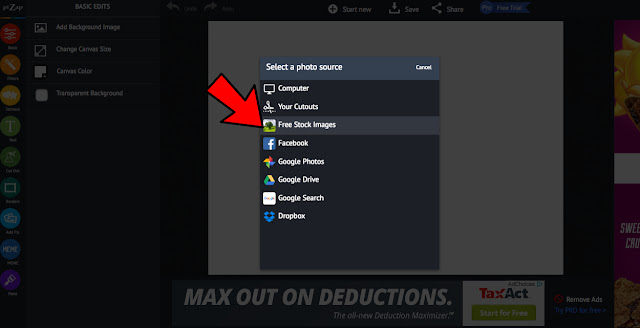
Mama saves our pictures on our computer, so that is what we are choosing.

Choose your picture and click "Open"

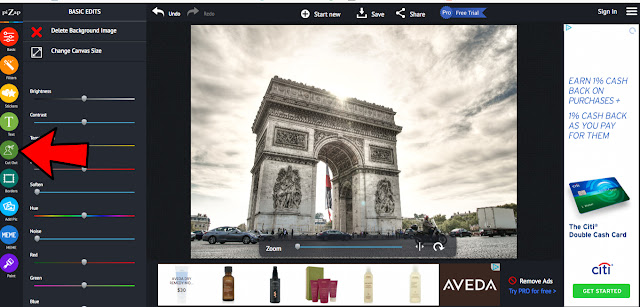
Now click on the little symbol that looks like a human with scissors in their head (I know...weird, right??). This is the "cut out tool".

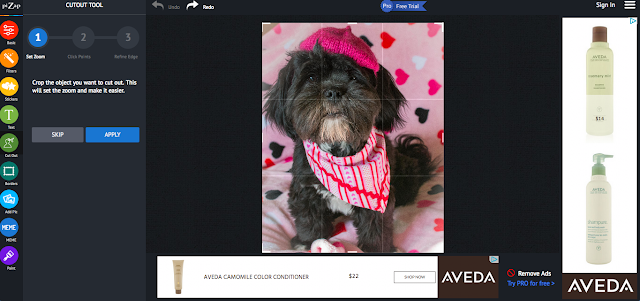
Now it's time to choose the subject you want cut out.

In our case...this is Bilbo. Select the picture and click "Open".

It will cover up your background picture, but don't worry....3
The background picture will come
back after you finish your cut out!Make sure the paint dot is clicked
and you choose a brush size that works for you. We used the medium brush
size because Bilbo is kind of small.
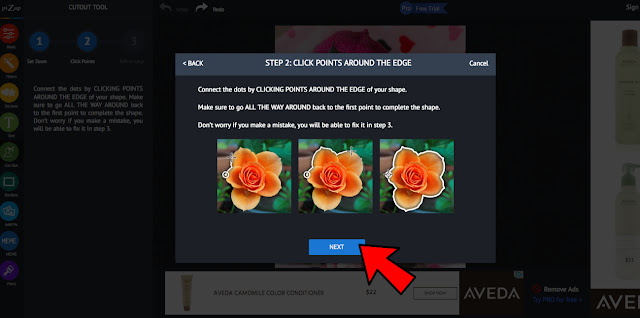
Now you are going to "color in" the part of the picture you want to cut out with your mouse.
Now you are going to "color in" the part of the picture you want to cut out with your mouse.
(left click and color with MS click and color with MAC)

Don't worry if you make a mistake, you can click on erase and use your mouse to erase the mistake!

Once you have colored in the part you want to cut out, click on finish!

and look...there is Bilbo in the marsh with the duckies, BOL!!
You can move the cut out around with your mouse and make it bigger or smaller by dragging the corners in or out!

We made Bilbo a little smaller and moved him to the side!
We are done editing for this week, so we want to save the picture. To do that click the blue SAVE button in the upper right corner.

You can create a caption...we chose, "Muddy Bilbo."
Then click the blue SAVE button.

Then you can save it to a place on the computer where your staff will remember it....The desktop is always a good place for our Mama.
So now we have Bilbo IN the mud.....next Thursday we will see what we can do to get Bilbo
MUDDY!!!!!
If you have any questions about Pizap, PicMonkey or even Photoshop,
feel free to leave us a comment and we will answer it next week...or
email your staff with the answer. We here at the Department of Artistic
Services are here to serve YOU!!
Please note that we are not advertising, and are in no way affiliated with PiZap. It is a photo editing site that we enjoy using only. All our opinions and directions are our own.
HOW TO MAKE A QUICK VALENTINE
JANUARY 29, 2015

Pawfessor
Jakey, Blogville's Director of Artistic Services, here to teach you a
quick and easy way to make a Valentine on the computer!!
This month we are going to use Pic Monkey
in order to create our masterpiece!! There are no programs to download
and they have lots of different ways to "dress up" for FREE!!!
First, we will need a volunteer from the audience.....
you (or your staff) can use any type of photo
(taken with camera, a phone or a tablet) in PicMonkey.
you (or your staff) can use any type of photo
(taken with camera, a phone or a tablet) in PicMonkey.

Thanks for volunteering, Arty!!
Now, let's make Mama a Valentine!
Now, let's make Mama a Valentine!
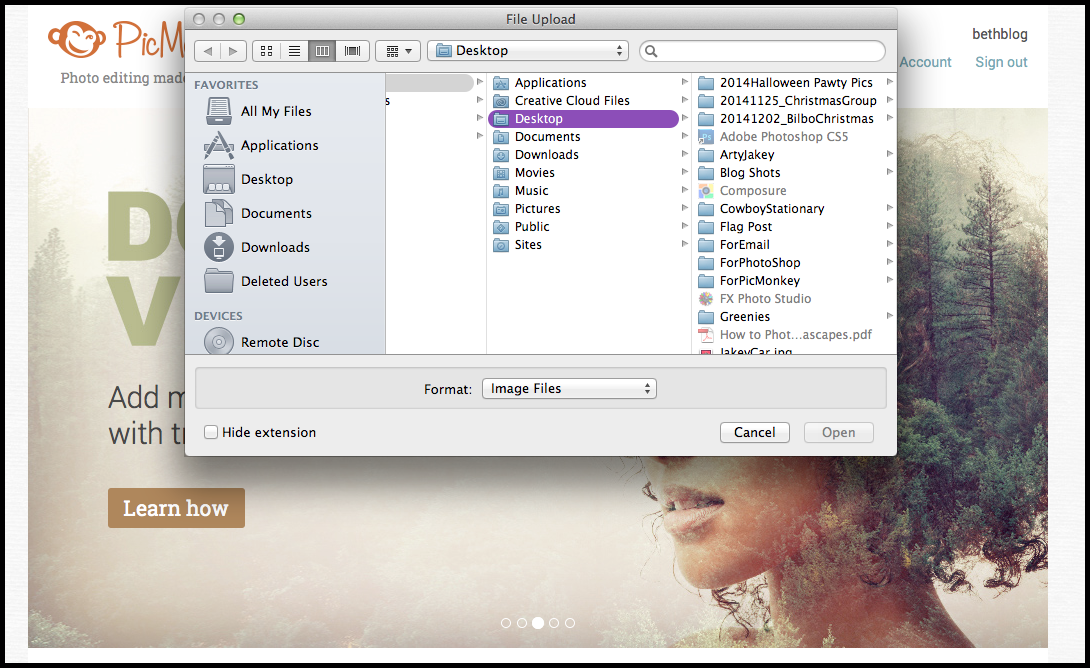
First thing we do is go to PicMonkey


as you can see you can get your
picture from a few different places. Arty's picture is on Mama's computer, so that is where we clicked!

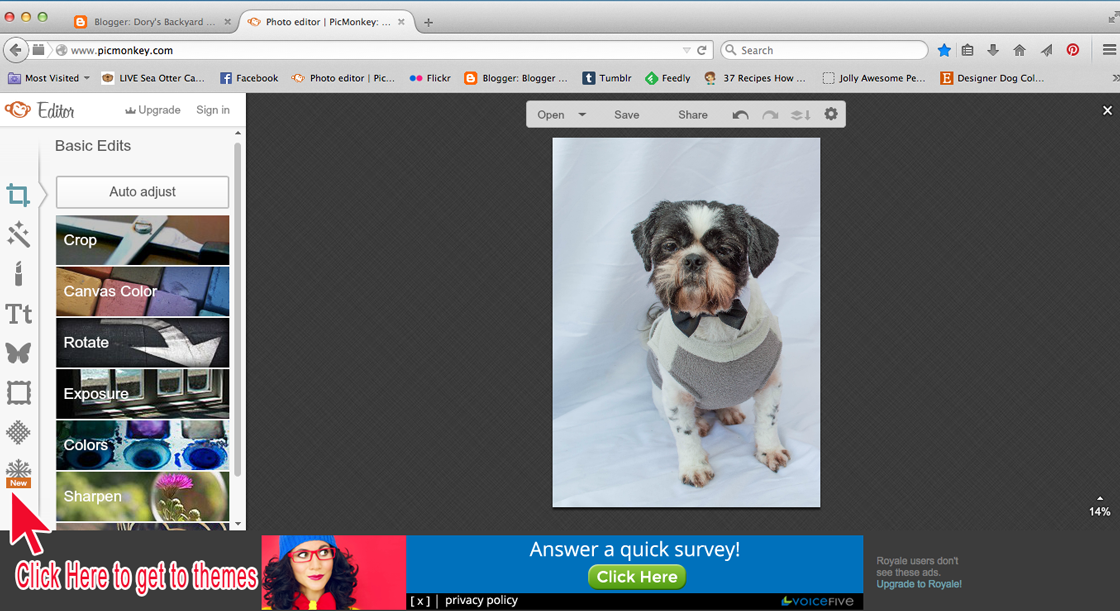
Clicking this will take us to where we can see all of the themes.


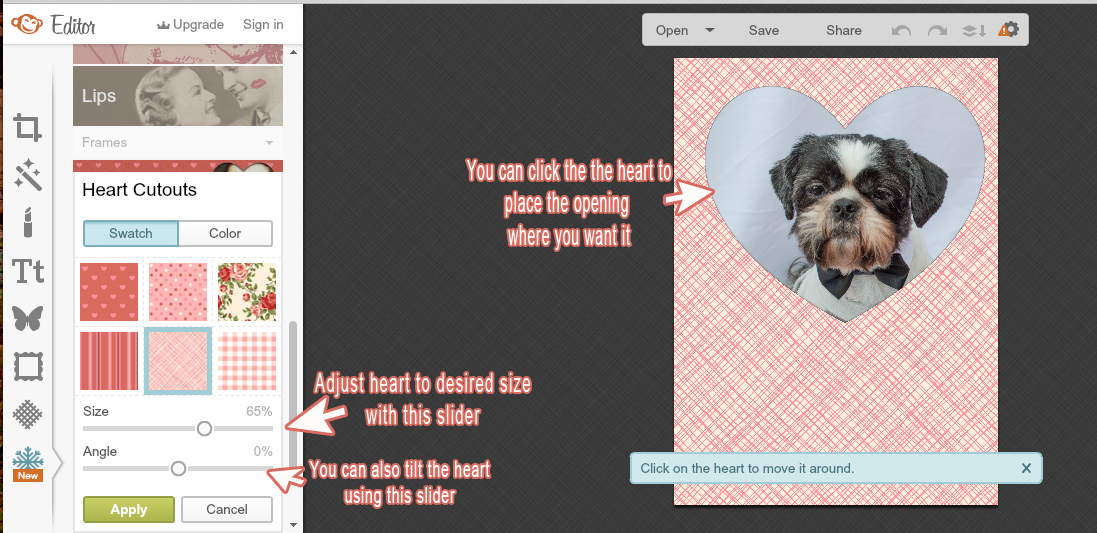


Click on the "Sweet Nothings" tab on the left.


fun things to choose from, we chose a couple of "doodly hearts.

Click
the heart(s) you would like to use. You can move them around by
clicking the heart and dragging it to where you would like to place it.
Change the size by dragging the corners and even change the color of
the heart!
 Now that you have things all pretty, let's save it!
Click on "Save" up at the top of the page.
 On the left you will see a few different things to choose. Mama and I are telling you what we use.
Depending on your computer, and what you are going to use the picture for, you may want to use different settings. Feel free to ask us in the comments or email us with any questions.
Name your file something that you will remember, we used Arty-Valentine. We saved it to medium format (this works for just about everything). The dimensions will automatically fill in (Mama is picky so she picks the size herself).
Next Click Save to my Computer and we are almost done!
 Make sure you save the final product somewhere you remember it. I
can't tell you how many times Mama has saved something and then forgot
where she saved it!! In this case, Mama saved it to her Desktop.
Make sure you save the final product somewhere you remember it. I
can't tell you how many times Mama has saved something and then forgot
where she saved it!! In this case, Mama saved it to her Desktop.
 And TA-DA
You can add the dressed up photo to your blog just like you add a regular picture!!!
Questions, concerns....???
Let us know via email or comments and we will do our best to explain it in upcoming posts or get back to you with the answer!!
This is Jakey, Director of Artistic Services, saying....
Happy Creating and we will see you next month with our next photo class!!!
We will be saving all our photo classes to our "Photo Class" page for easy reference
Please note that we are not advertising, and are in no way affiliated with PicMonkey. It is a photo editing site that we enjoy using only. All our opinions and directions are our own.
Click on "Save" up at the top of the page.
Depending on your computer, and what you are going to use the picture for, you may want to use different settings. Feel free to ask us in the comments or email us with any questions.
Name your file something that you will remember, we used Arty-Valentine. We saved it to medium format (this works for just about everything). The dimensions will automatically fill in (Mama is picky so she picks the size herself).
Next Click Save to my Computer and we are almost done!
You can add the dressed up photo to your blog just like you add a regular picture!!!
Questions, concerns....???
Let us know via email or comments and we will do our best to explain it in upcoming posts or get back to you with the answer!!
This is Jakey, Director of Artistic Services, saying....
Happy Creating and we will see you next month with our next photo class!!!
We will be saving all our photo classes to our "Photo Class" page for easy reference
Please note that we are not advertising, and are in no way affiliated with PicMonkey. It is a photo editing site that we enjoy using only. All our opinions and directions are our own.
No comments:
Post a Comment
We love to read your peemails!!